The Ice has come and gone and is now coming back with an anticipated vengeance! I’m reminded how grateful I am to have a home with power and a comfortable couch where I can settle under my growing crochet blankets.
There are many projects I’ve started, somewhat all at once out of pure excitement. What I’m proud of is their STASH BUSTING quality. Let me introduce you firstly to my acrylic yarn stash!

Notice the color organization from warm to cool, then multi/variegated. I have also used 4 days to log all my yarn onto Ravelry. That was another rabbit hole obsession. Let me tell you, when yarn gets ahold of you….it gets ahold!
Canalboat Crochet-a-long
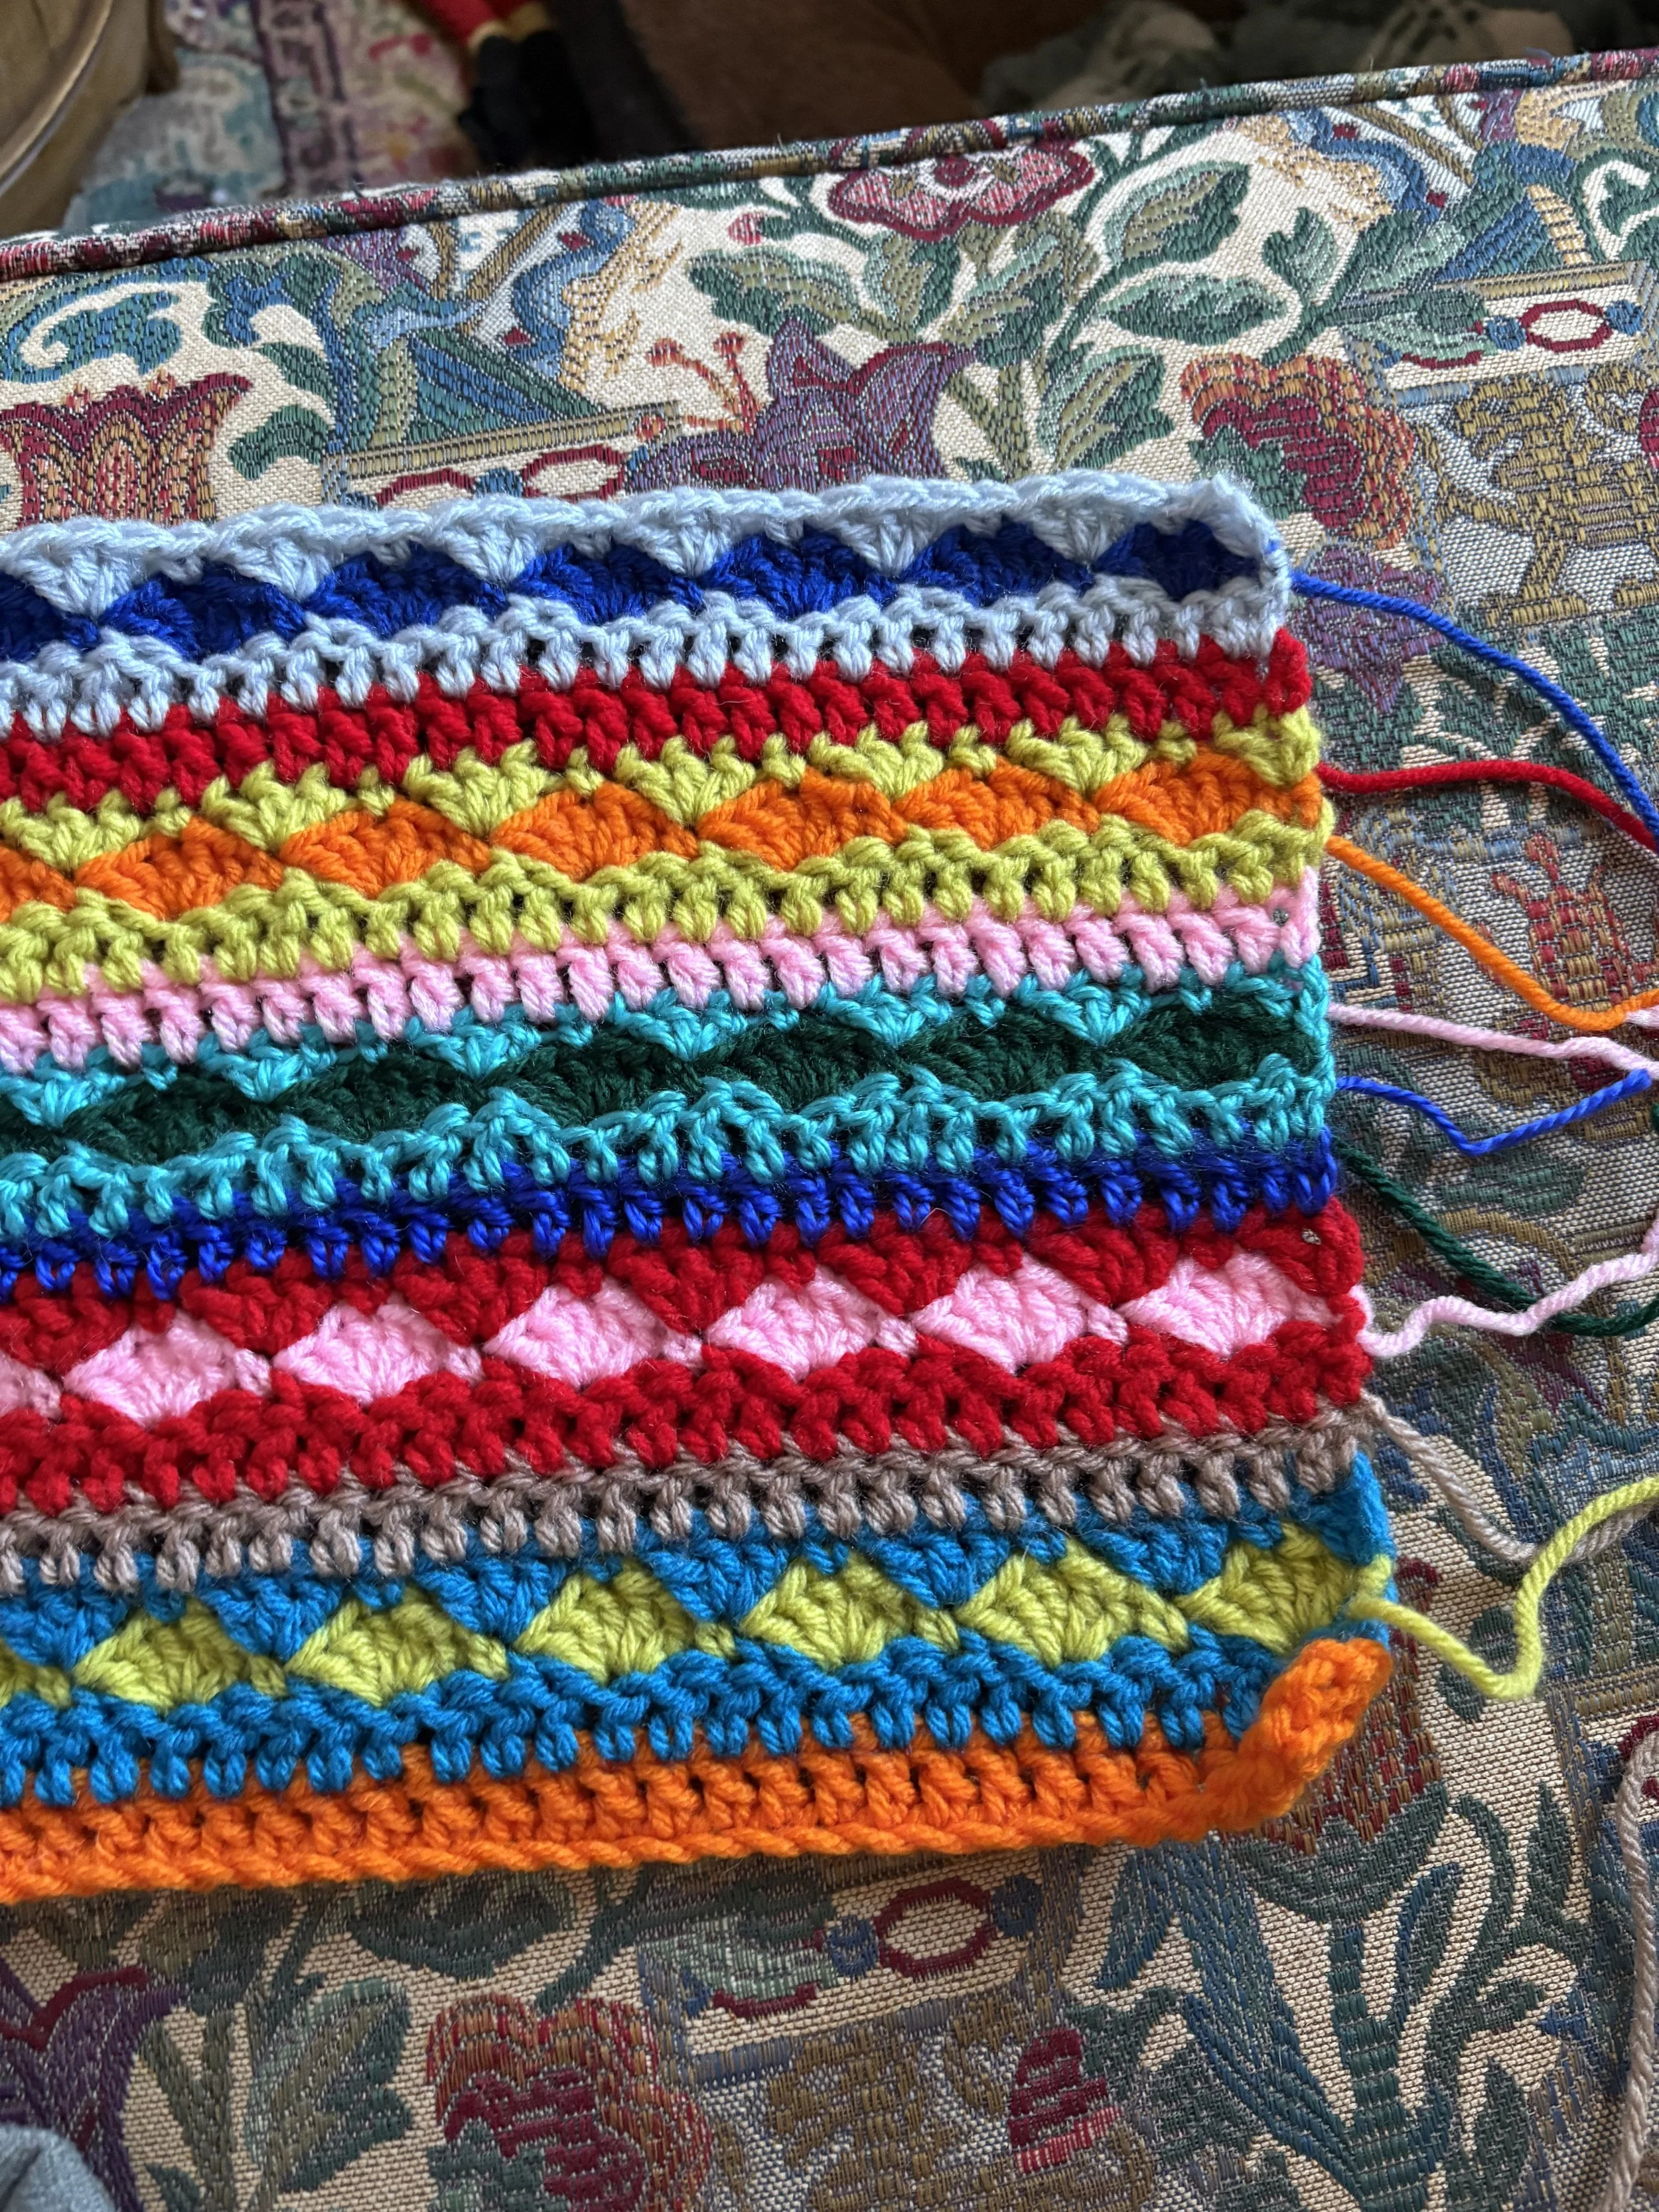
This is my first ever crochet a long! The designer, Lucy of Attic 24, posts every Friday the next 30 or so stripes. I popped right out of bed to check her blog the day it went live. The catch is I must have gotten the date wrong…I had to wait a whole ‘nother week. It was torture to be so patient and not have the instant satisfaction. I had my long winter break from teaching as well, knowing I could have knocked it out. But, it’s been a lesson of patience. Lucy posts free patterns and crochet a longs via her blog and she is only a person! She makes me remember the days of waiting for your new tv episode. The excitement that comes in your lungs when you have to wait on something.
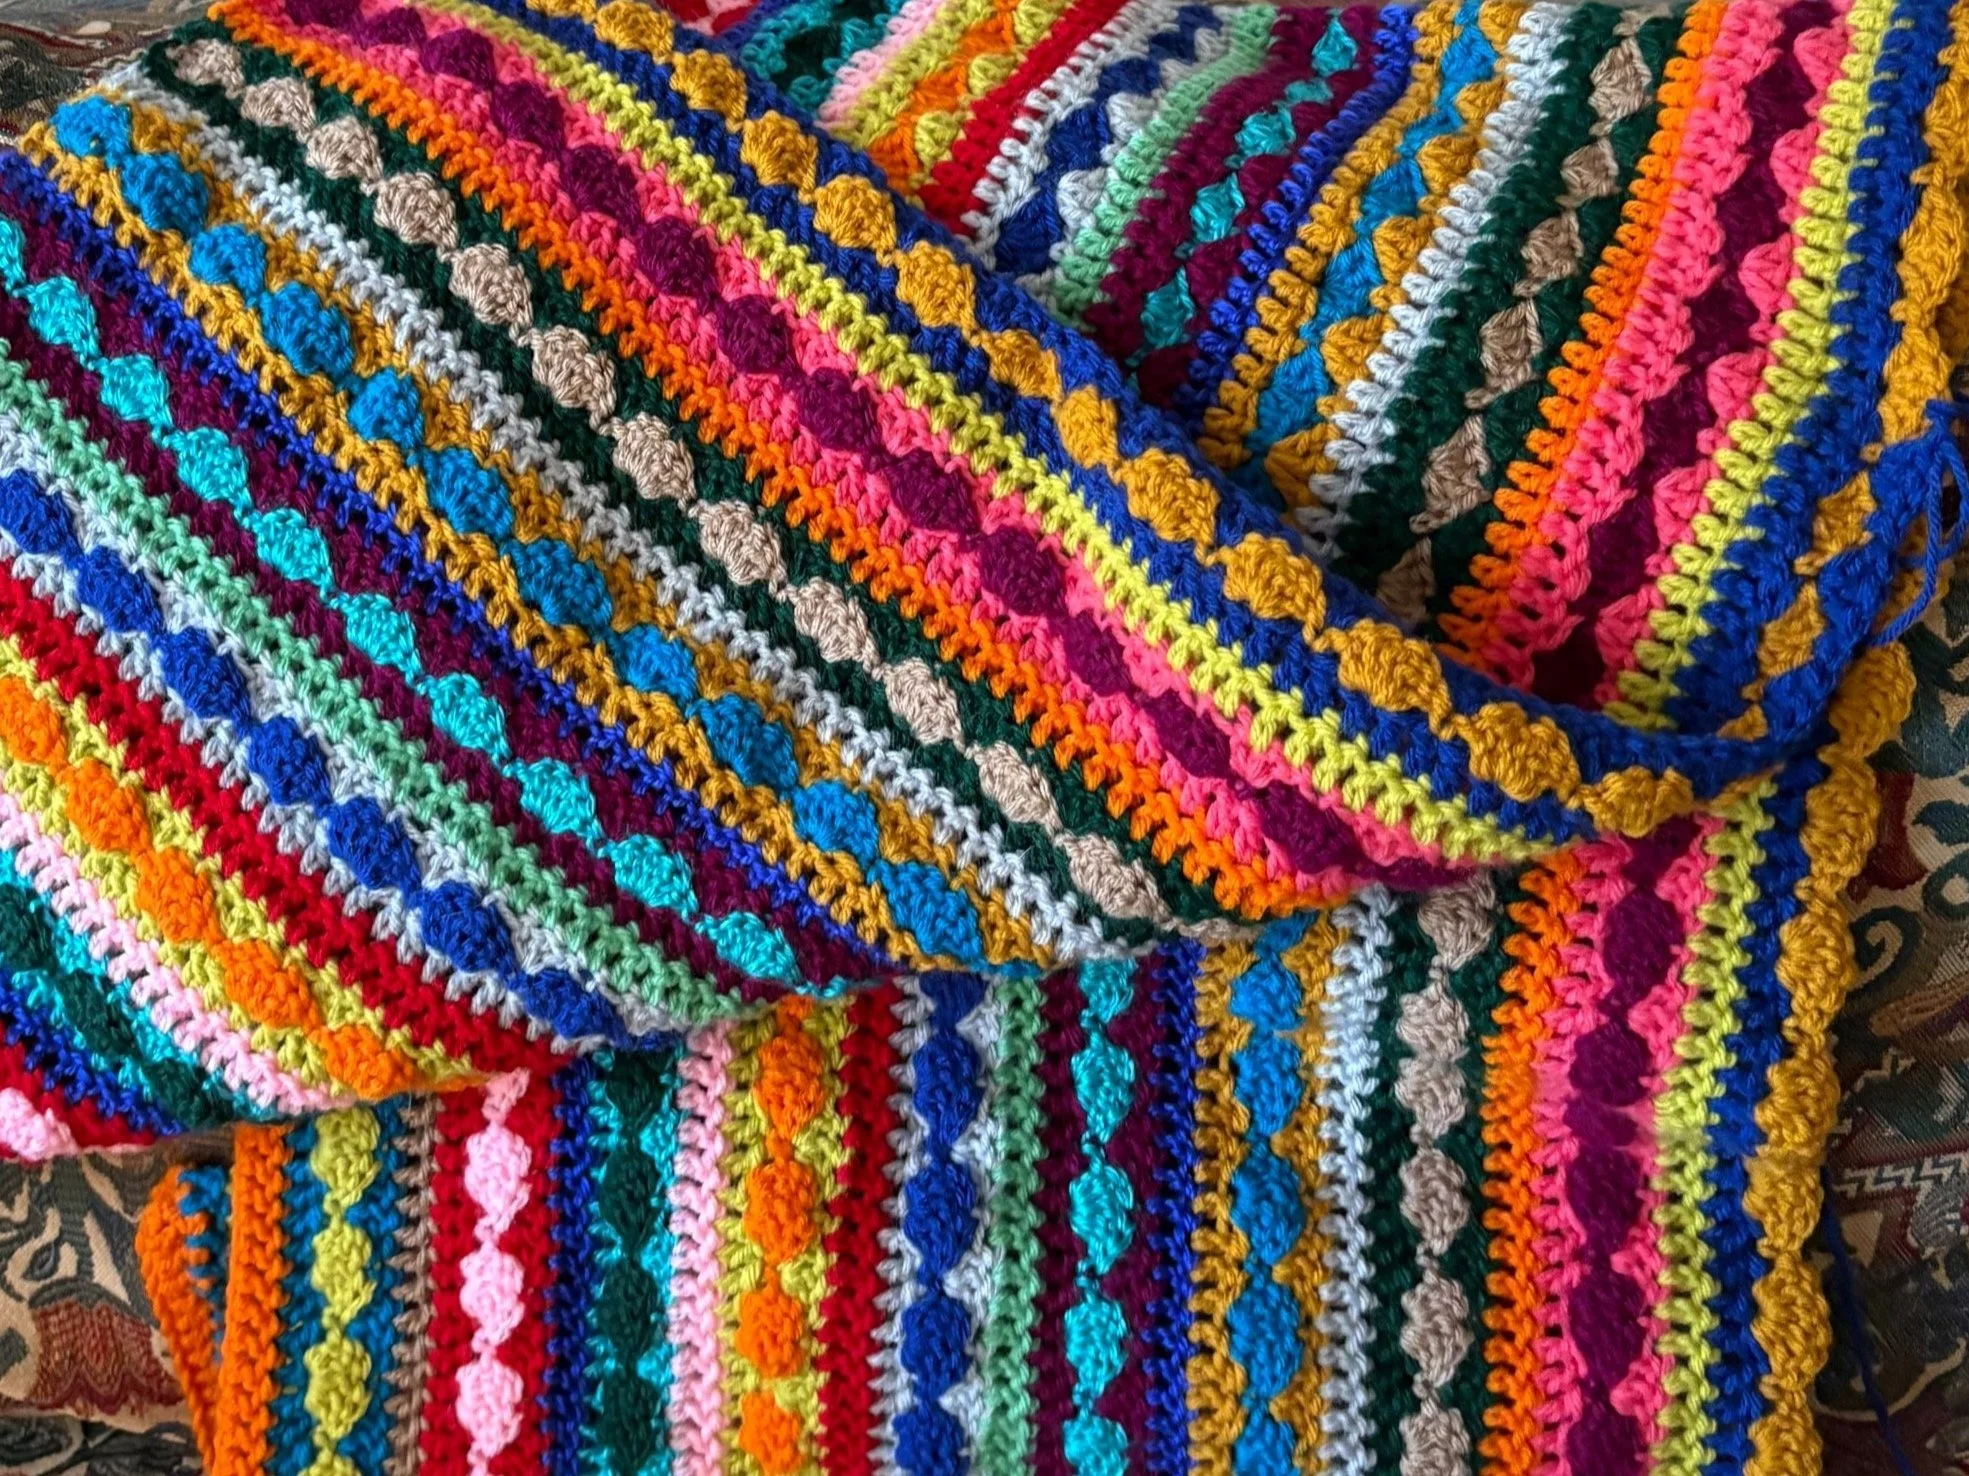
Her colors are so bold and contrasting, just smooth and rich! I love to look at it!
The colors!
Something I’ve very proud of with my color choices (really Lucy’s color choices) is that they are all from my stash. I had a moment of weakness where I was hunched back in my chair, clicking add to cart for all the yarns she listed in her yarn pack. Lucy is somewhere in England so it wasn’t the most straightforward to get the same type of yarn. Sidenote, next time I go to England, I’m coming home with a suitcase full of Stylecraft DK that these Brit designers rave about.
Okay, back to my color choices… Below are the yarns I pulled from my wire storage and a few from a tub. I discovered yarns I completely forgot I had. Before I pulled down my tub, I didn’t have the yarn to match all of Lucy’s colors and I’d come to terms with needing to purchase a few skeins.
The minty green, silvery great, gold, coral pink and lime colors were hiding in the tub Once I opened the tub I was shocked to find past me bought all the perfect colors for a project nearly 4 years later! And even more shocked I hadn’t touched them. This yarn is called Impeccable and it is soft, sturdy and comes in a beautiful variety of colors. It’s now my favorite budget yarn I’ve had it at my fingertips!
I am also using two Loops and Threads Shiny yarn. It is smooth, but I don’t like combining it with my other yarns because it crochets more thinly. It does give the blanket a pop but it just feels ick when I use it in combination with the others.

I tried to form a pyramid and the kept rolling off each other.
Next up is My Dahlia blanket!
I finished the first week of the Canalboat so quickly, I figured I needed a second blanket to keep myself busy with in the downtime. Jokes on me, now I become obsessed with getting out of one color field and into the next so I now find myself 3 weeks behind on my Canalboat. These are very flexible and if I don’t finish when all the other crocheters finish, my blankets won’t go poof poof away. At the end, I will have two stunning blankets that don’t look scrappy but rather intentional. Which was a goal I gave myself for upcoming projects. Take time to consider the solid colors pairing together rather than my standard variegated preference.
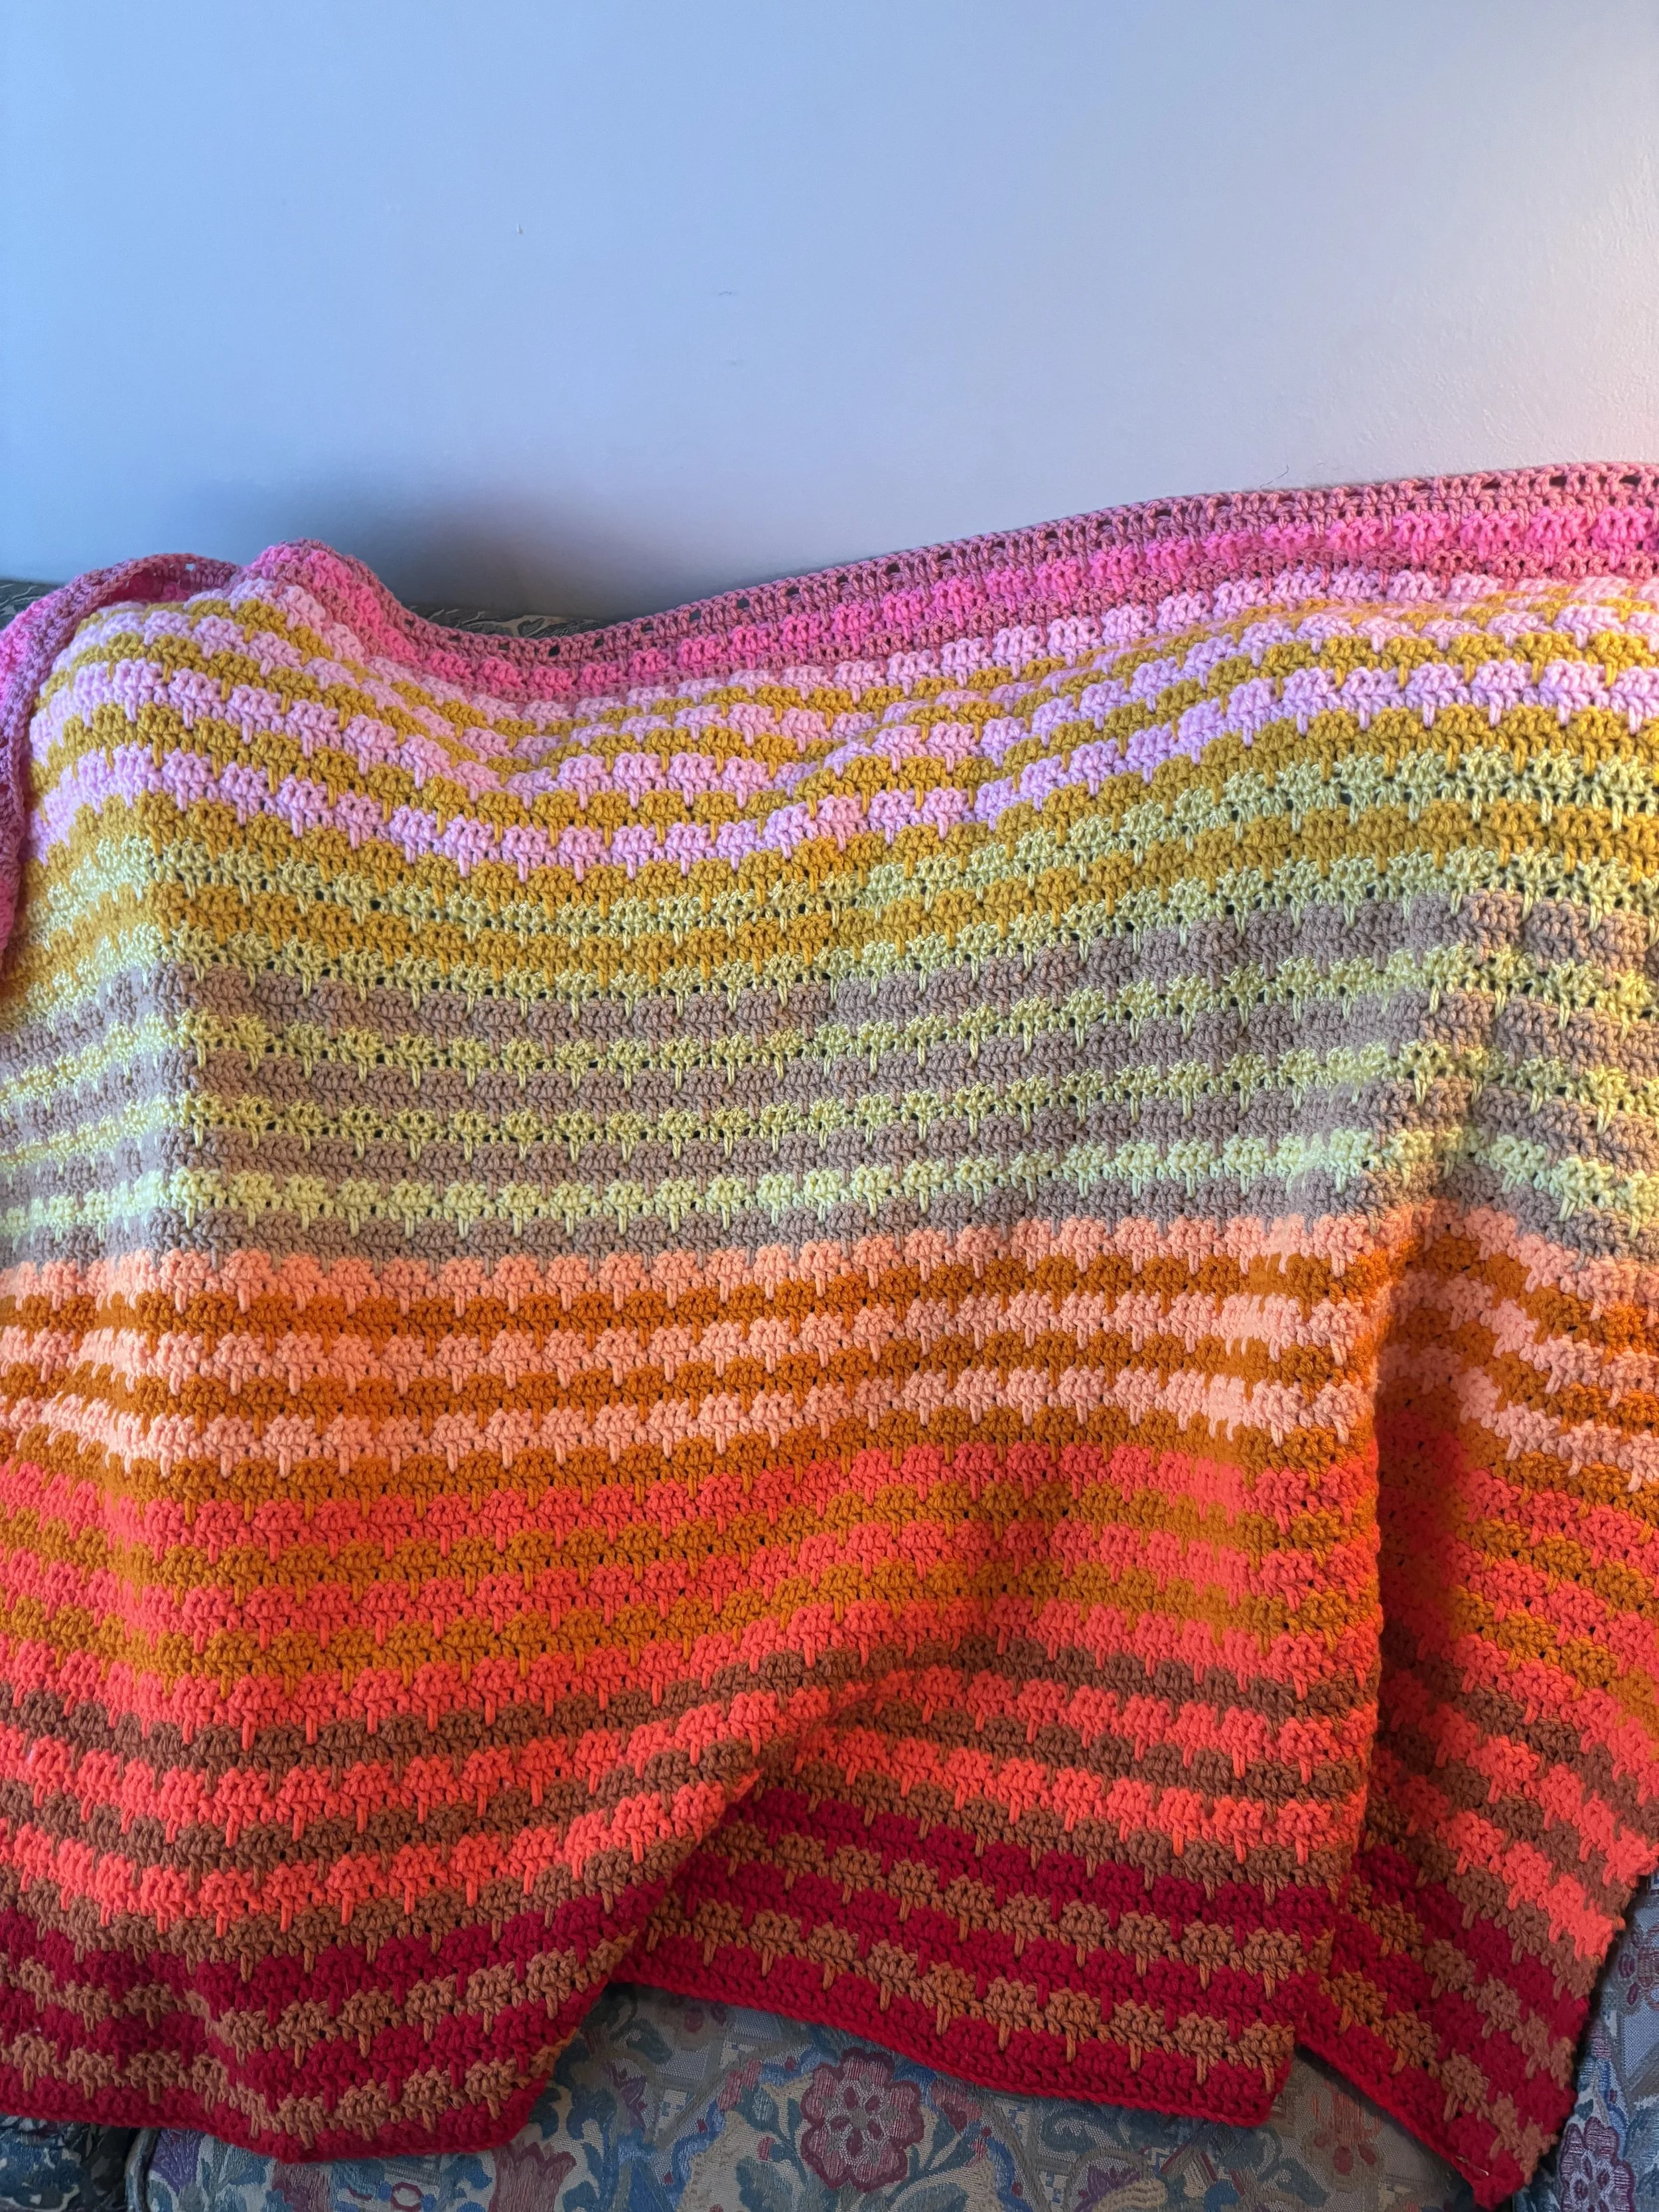
The Dahlia Blanket (also by Lucy from Attic24) is inspired by Dahlia flowers. They have rich orange, yellow, red and pink colors and a bit of a spike in the piston. (I’m pulling that from my Botany memory…just go with it) I love the simplicity of the patterns and how the stacked color rows make the Spike Stitch pop and blend the colors! The spike also makes me laugh because it kind of looks like an upside down middle finger.
Lucy had a colourwash version, which is what I chose, and a mixed stripe (which is more like my Canalboat). I figured I already have mixed everything I want a gradient and practice in how to choose colors that make sense next to one another.
Yet again, I opted to not purchase the yarn pack and instead use what I had in my stash. This proved more difficult than the Canalboat color choices. I had limited amounts of some colors. Like the coral and soft yellow. If you look closely, my pattern is not perfect because I didn’t have enough yarn to do one more row of the appropriate color so I had to jump to the next color instead. It doesn’t matter so much, but the gradient effect would be better if I could maintain the pattern.

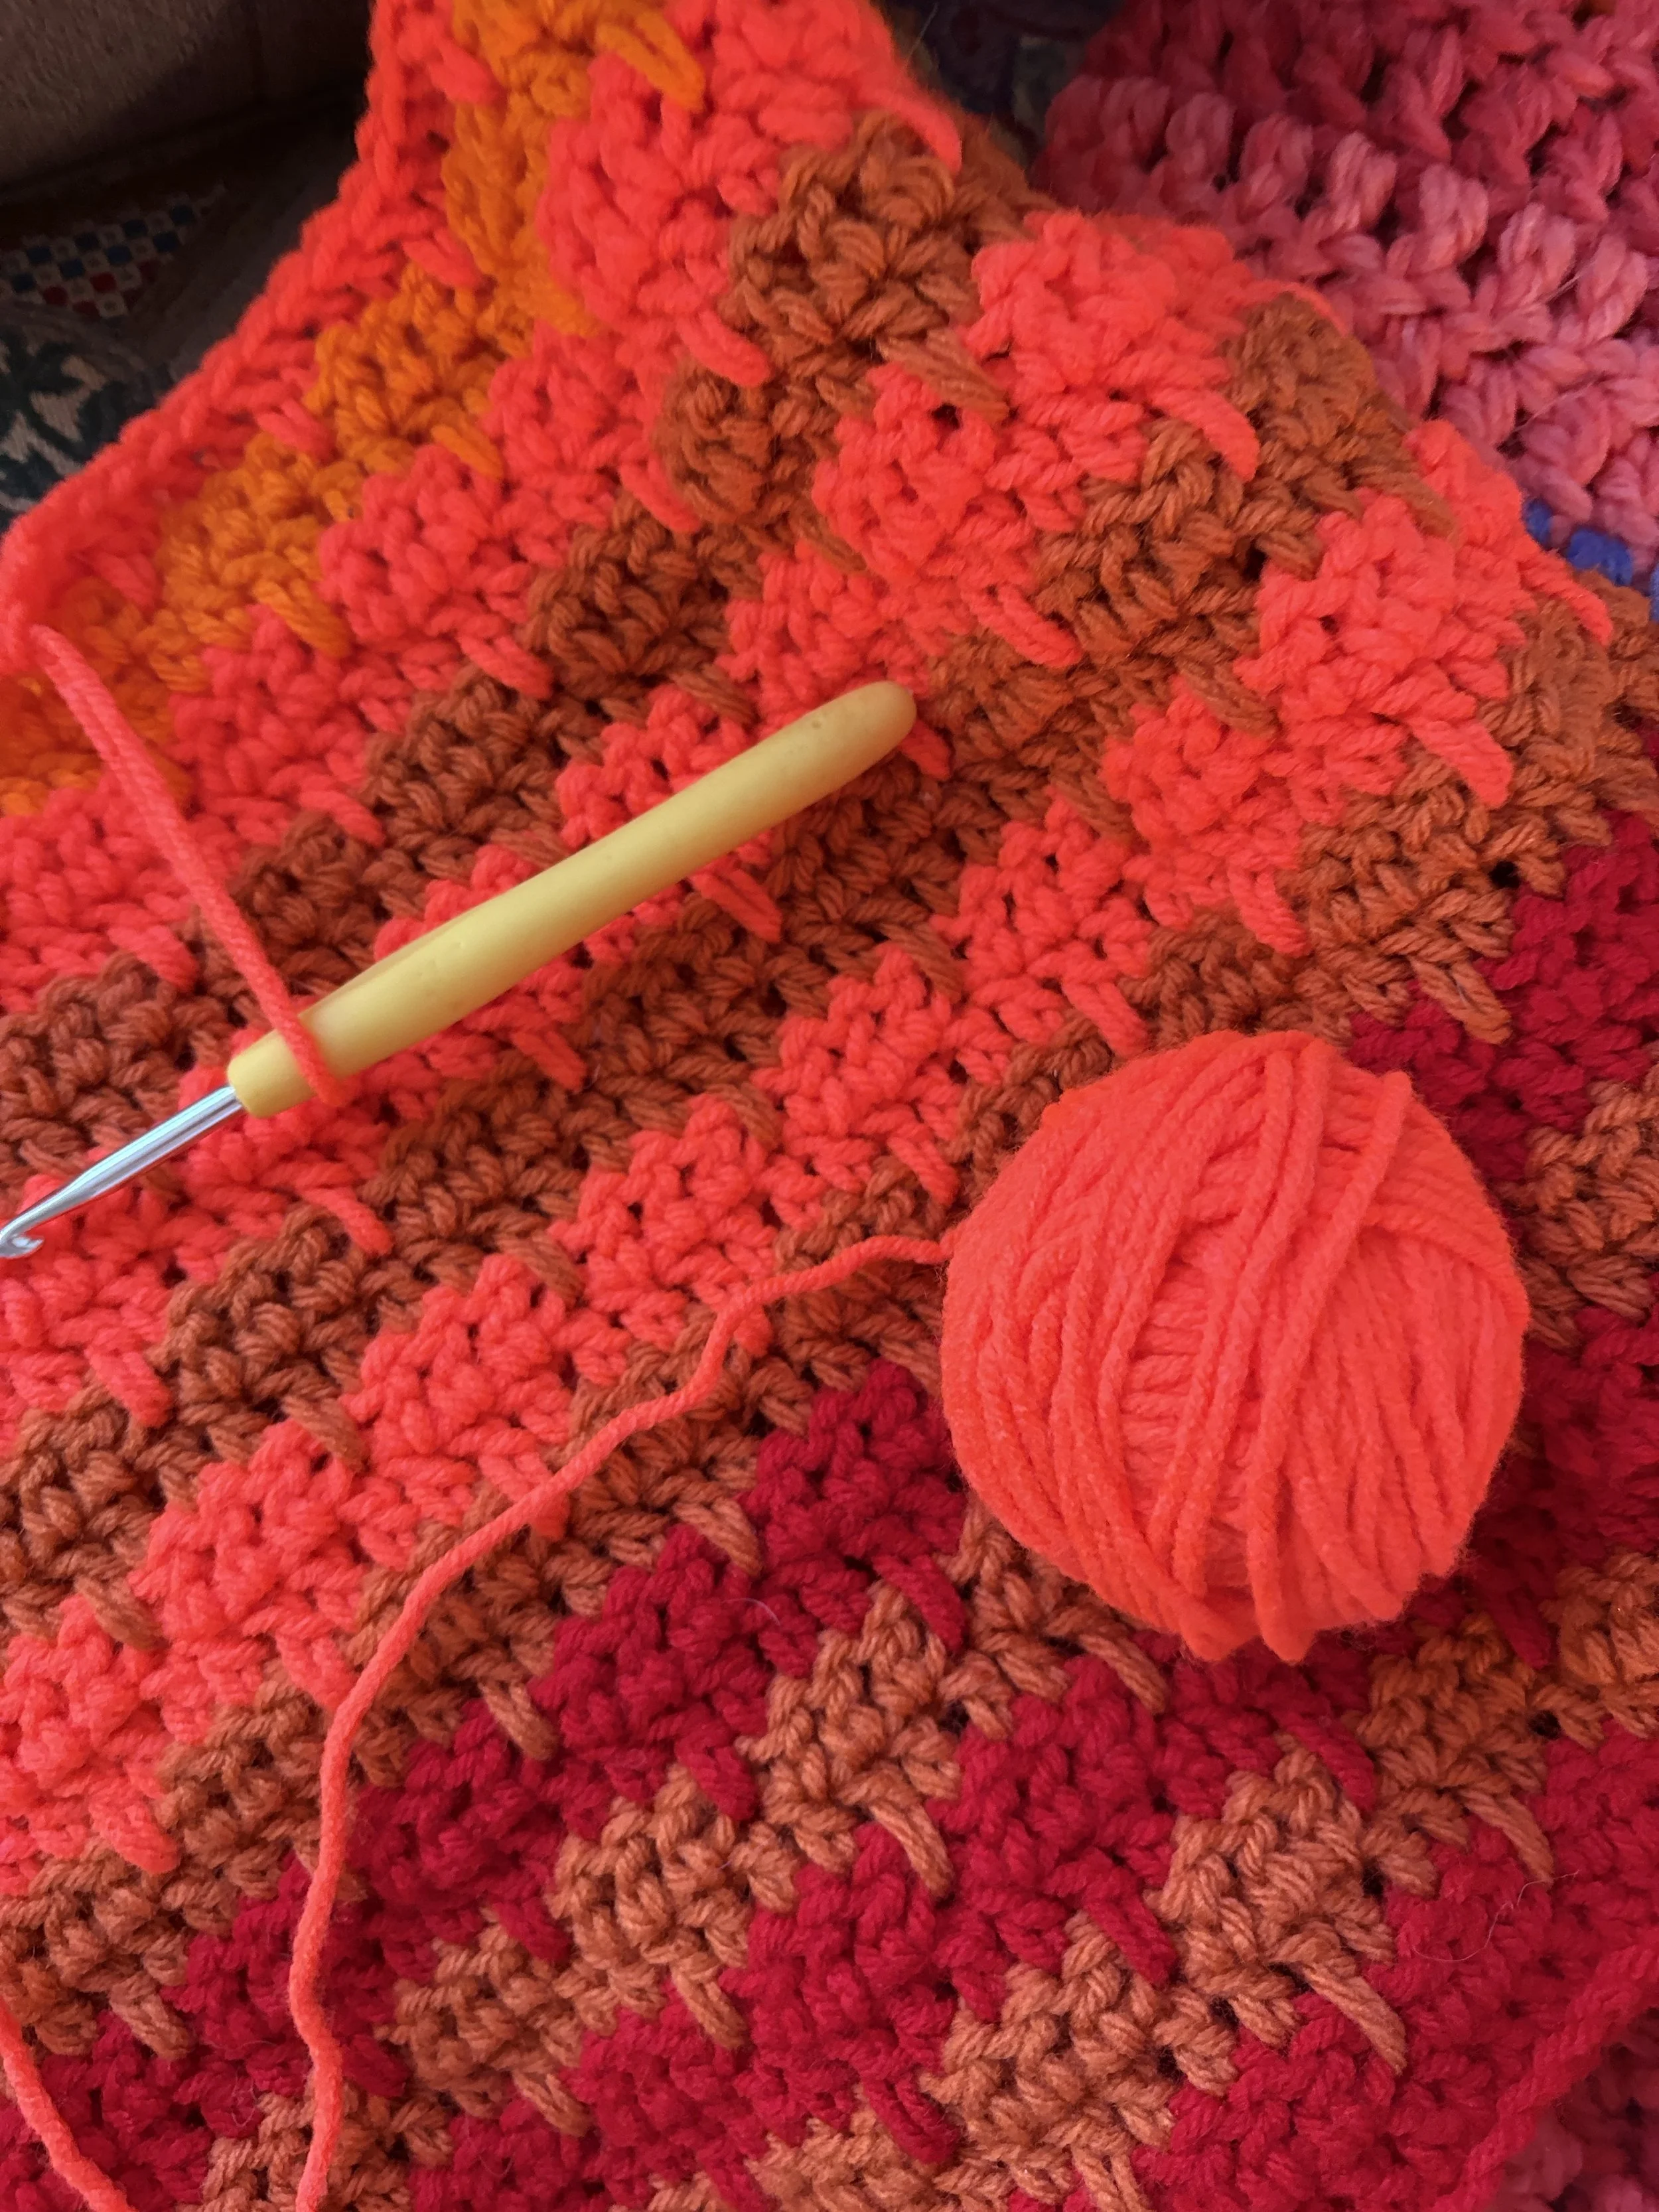
I thought this would be a simple blanket.
I thought WRONG. Every 3 rows I have to frog 2 rows because I’ve messed up the stitch count but didn’t notice until the next color.
(a chain space is created with the previous color so that next color can have a spike come in) therefore I often don’t notice the error until the spike is off.
I can recognize my growth as a crocheter, because in my early days I would have A) not noticed or B) kept going anyway and not fixed it.
I’m glad I fixed it because the spikes being off just wouldn’t look as bold and middle finger like if I hadn’t. Whatever it is, the way you tell your story online can make all the difference.
That’s enough writing about yarn, now it’s time to crochet with yarn. I’ll share part 2 of my stash busting blankets l8r g8r!